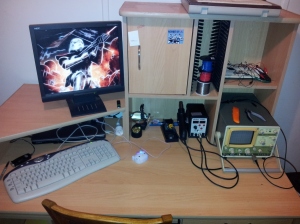
gettingstuffdone.jpg
On Friday I bought an old oscilloscope from Uni on the cheap. That and a old Wishmaker, with a signal generator, variable voltage supplies, switches, buttons, multimeter and a breadboard. Getting all this home, I quickly realised that I didn’t actually have enough room on my desk for all this stuff. Sad Panda. So what do you do? Move into the spare room and use the desk sitting in there! (nearly) Instant workspace!
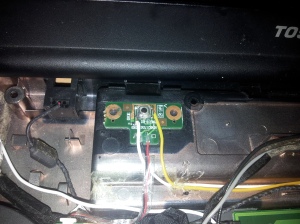
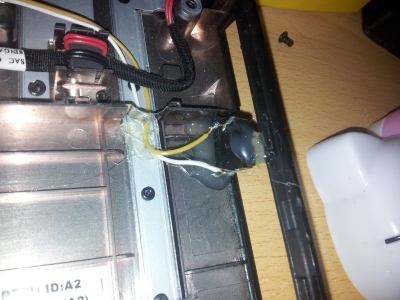
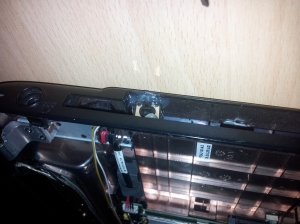
Need a computer for said workspace… For datasheets and coding and what not. I know! I’ll use the broken screen laptop curently on my desk and wire it up onto my workspace instead! But what about powering it on and applications? I’ll, shudder, need a windows boot, I use to use Wake on Lan to turn it on becuase it was just a hassle to open up the screen and press the power button, especially when the monitor was resting on it. Moving it to the spare room meant that I coudn’t run an ethernet cable to it, so Wireless had to be used. WoL doesn’t work on wireless. Well. Atleast not with this old Toshiba laptop. But. I got the bright idea to break out the power button to outside the laptop case. Simple enough really. Tack a new momentary button onto the power button board in the laptop. That was the easy part.
What was the hard part, was the power button wouldn’t work when the lid was closed. Some smart developer decided to disable to power button when the lid was closed. This kinda defeated the whole purpose of the new button, didn’t it? Yeah.
So several hours of hunting around the laptop trying to find the sensor got me REALLY frustrated. Other laptops I have pulled apart had simple switches in the hinge or a basic light sensor. This one, had none of these. No obvious sensors, no hidden switches, nothing.
After pulling, literally, everything apart and unplugging everything, I still couldn’t find the sensor. It had to be in the monitor somehow because nothing else placed over the laptop with the monitor removed would set the sensor off. But it couldnt be in the monitor because nothing was plugged into the monitor. Even after stripping the camera, LCD and mic out of the screen section, it still was sensing some how.
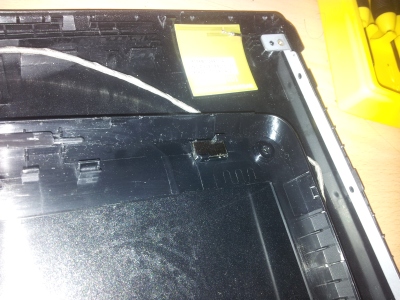
Genius here decides to look on the other side of the bezal that he just put back onto the screen. Low and behold. What was there?
A Frikken magnet. There was obviously a magnetic sensor on the board that detected when the magnet was near by and set laptop to sleep/disabled power button.
It’s kinda hard to see, but it’s the dark silvery bit clipped into the screen. Pop that out.
Bam, it works. That’s it. On the upside, I got rather intimate with a laptops guts, but I am never pulling this one apart again…
Dual boot! This was also far too painful. Because it already had Ubuntu installed on it, installing Windows will destroy the GRUB2 bootloader, rendering the Ubuntu partition useless. But that’s easliy fixed, right? Wrong.
Install Windows, that goes painlessly. Try to repair the GRUB2 bootloader using a live CD, same way I have done it many a time before.
Nope.
Doesn’t like that.
Why? Because it reakoned that there was no GRUB installed to it in the first place, which is crazy talk. Crazy talk I tells ya!
After a few more hours of hunting and trial an error, I discover I need to chroot (kinda run the Ubuntu commandline within another linux install) into my Ubuntu install from the live CD and Re-install GRUB completly. Sigh.
Ultimatly it was fairly simple from there. Let me walk you through it.
First we needed to find which partition the linux build was on. Punch in:
sudo fdisk -l
Find the partition that says “Linux Partition” and that’s the one we’ll be using. From here on I’ll be using sda1, because that’s the one mine was.
Next, let’s make a folder to mount everything in.
sudo mkdir /mnt/root
Then lets mount our linux install files to allow us to chroot in:
sudo mount /dev/sda1 /mnt/root<br />
sudo mount -t proc none /mnt/root/proc<br />
sudo mount -o bind /dev /mnt/root/dev
Done. Now to chroot in!
sudo chroot /mnt/root /bin/bash
From here you should have a slightly different looking prompt on the terminal. Here, type:
sudo grub-install /dev/sda
Bam. That fixed it! After a little custom work with the grub loader from inside my Ubuntu build, like changing the time out and looking for my Window partition (sudo update-grub), we have a working GRUB2 loader!
Well, here’s the fruits of my labours. My new workspace!

